
The Routings tab of a Customer Shipment (CS) is the physical route: one row per routing point, from the origin to the destination, each with its address. This article covers opening the tab, reading the points, setting and adding addresses, and what to check before you remove a point. The money attached to each point is on the Economics tab — see How to manage the economics of a Customer Shipment.
Before you start
- Routings is enabled once Service Type, Pickup Service, Delivery Service, Country From and Country To are set on the Basic Information tab. See How to fill in the Basic Information of a Customer Shipment.
- Open the CS from Shipments → Customer Shipments with the pencil in the Edit column, then click Routings.
- The addresses you pick come from your physical addresses. See How to Manage Physical Addresses in Freightools.
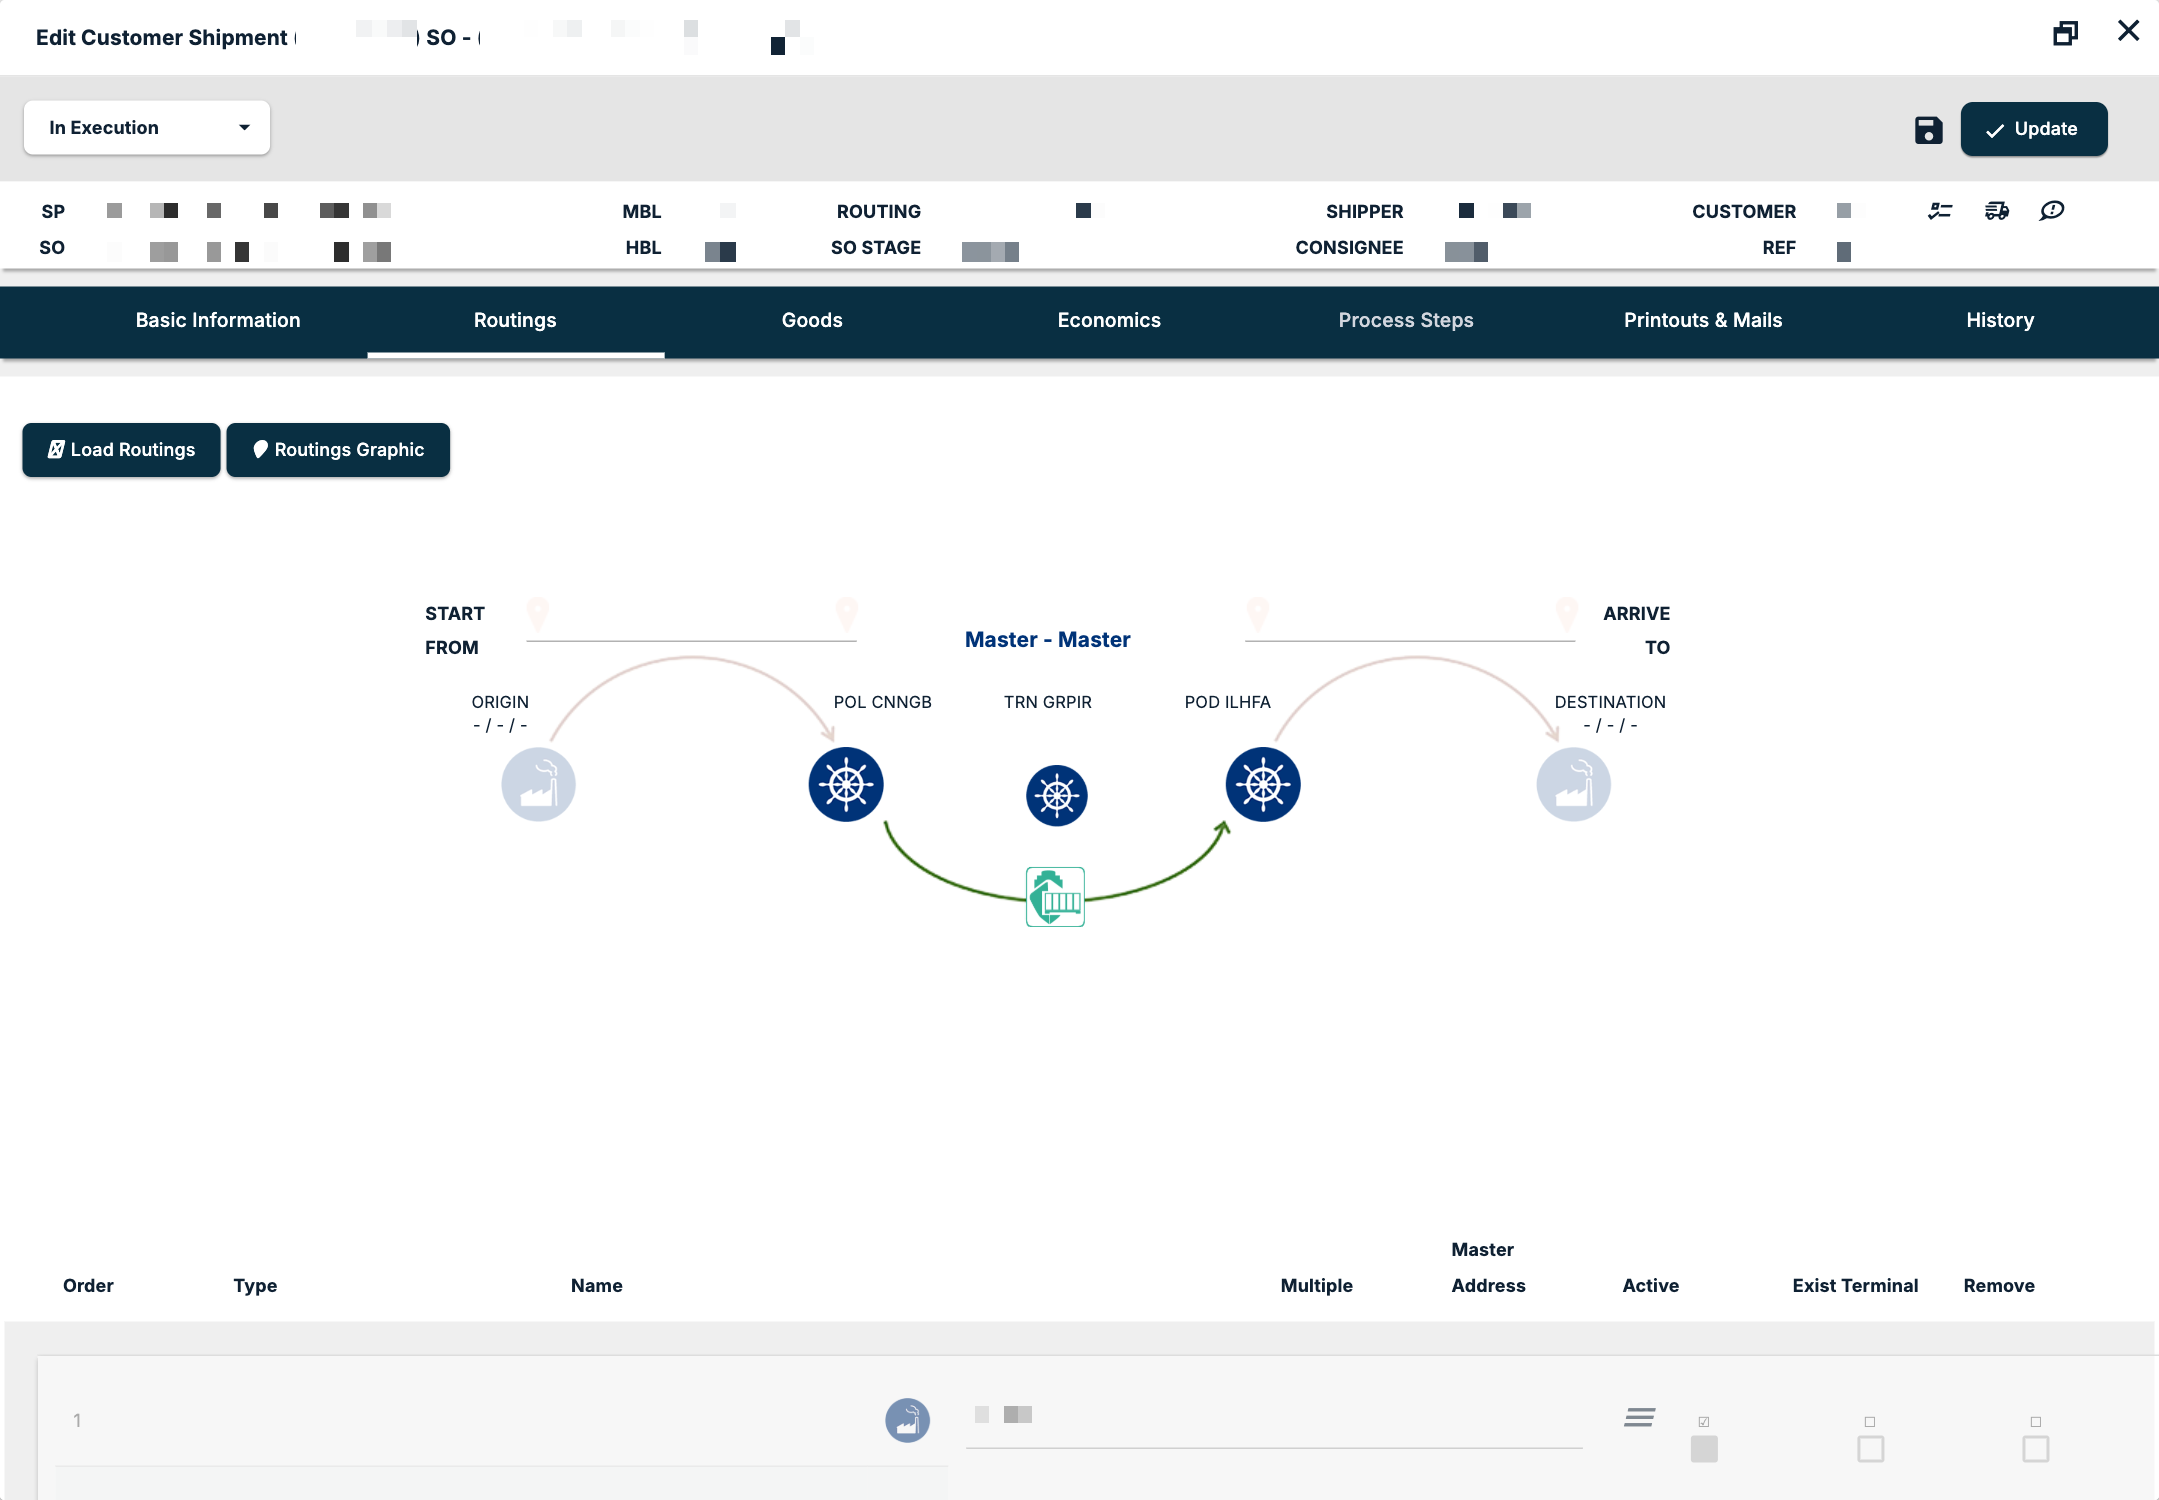
See the route at a glance
Click Routings Graphic to show or hide a strip across the top of the tab. It reads from START FROM to ARRIVE TO, with the origin, the port of loading (POL), any transshipment (TRN), the port of discharge (POD) and the destination, each with its dates.
Load Routings, beside it, reloads the routing points. It deletes the economics already on the CS; a warning message says so before it goes ahead. Use it only on a CS whose economics you mean to rebuild.
Read the routing points
The table lists the points in order. Its columns are:
| Column | What it shows |
|---|---|
| Order | The position of the point on the route. |
| Type | An icon for the address type. |
| Name | The name of the point, with its country and address. |
| (menu) | The point's menu (☰), on points that take more addresses. |
| Multiple | Read-only: whether the point takes more than one address. |
| Master Address | Read-only: whether the point is a master address. |
| Active | Read-only: whether the point is active. |
| Exist Terminal | Whether a terminal exists for the point. |
| Remove | Removes the point. |
The points of an ocean FCL import
On an Ocean FCL import CS the points run, in order:
- ORIGIN
- Pick-up Containers
- POL - Port Of Loading
- Ocean Freight Containers
- TRN (Transshipment)
- POD - Port of Discharge
- Delivery Containers
- DESTINATION
POL - Port Of Loading, TRN (Transshipment) and POD - Port of Discharge are locked.
Set the address of a point
Each point row has a country and address select, for example a port with its UN/LOCODE.
- Click the address select on the point's row.
- Choose the address.
- Use the copy icon to copy the address to the clipboard, or the x to remove it.
Add an address to a point
A point that takes more than one address, or has none yet, shows a menu (☰) on its row:
| Item | Use it to |
|---|---|
| Add Address | Add an existing address to the point. |
| Create & Add Address | Create a new physical address and add it to the point. |
| Clone Routing | Clone the routing. |
Before you remove a point
Activities on the Economics tab are grouped by routing point, so the route and the money are connected. Before you remove or change a point, open Economics and check which activities sit on it.
For example, when an EXW shipment with an origin pickup becomes an FOB shipment, the pickup leg goes — and so does any inland haulage activity from the origin to the port of loading. Check that activity on Economics first.
Save your changes
Click Update at the top of the editor to save the CS and close it.
If something goes wrong
| You see | What to do |
|---|---|
| The Routings tab is greyed out | Set Service Type, Pickup Service, Delivery Service, Country From and Country To on Basic Information. |
| A port point cannot be changed | POL - Port Of Loading, TRN (Transshipment) and POD - Port of Discharge are locked. |
| No menu (☰) on a point | The menu shows on points that take more than one address or have none. |
| The address you need is not in the list | Use Create & Add Address, or ask your Freightools administrator to add it to the physical addresses. |