
An office is a branch of your company: a location with its own code, address, opening hours and
contact person. The Offices tab lists them, and Create Office opens the form.
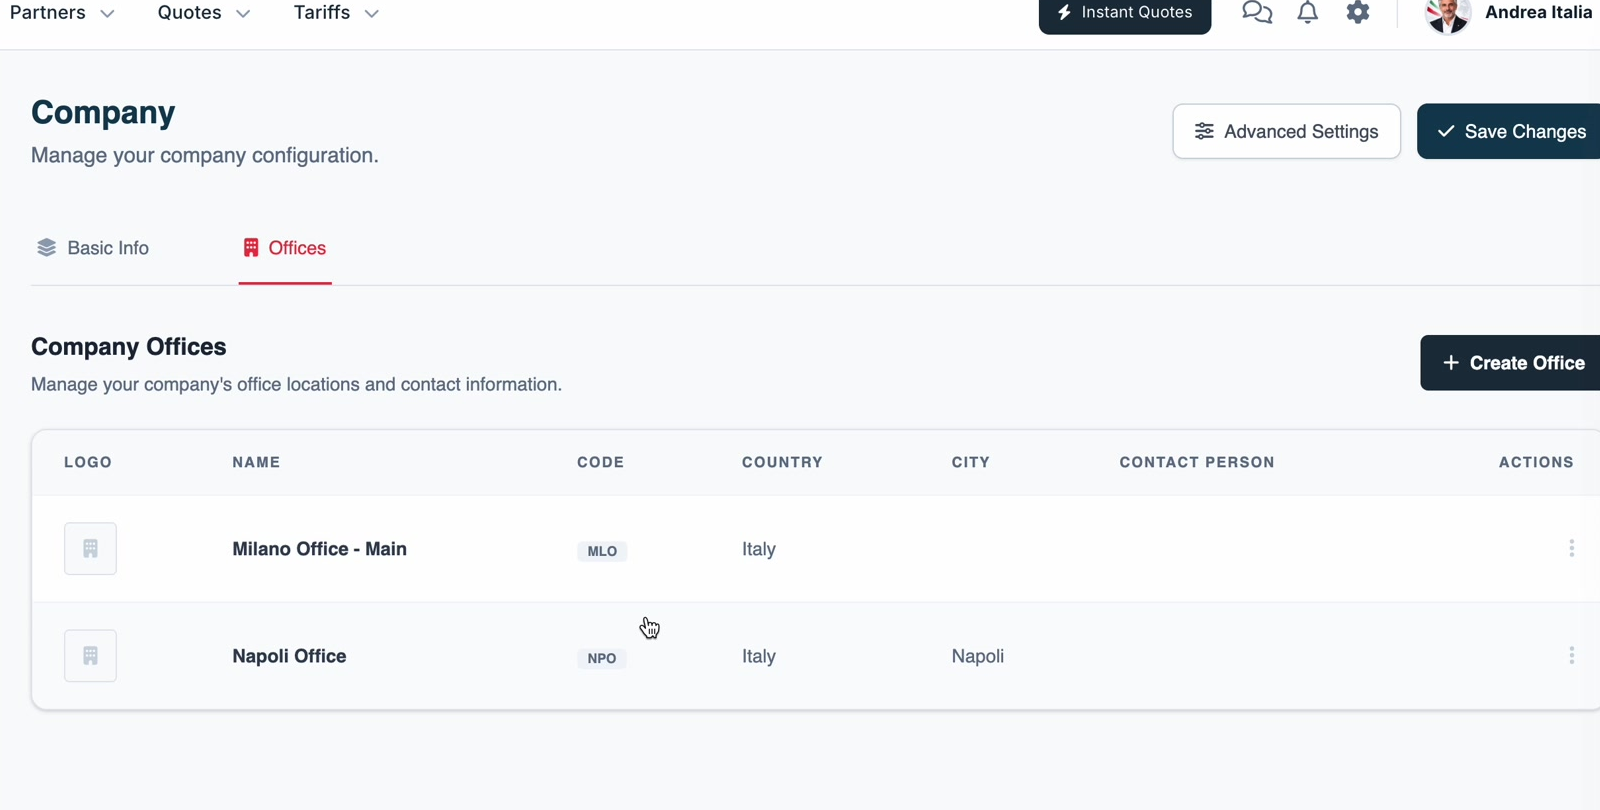
See the offices you have
- Open Settings → Company.
- Select the Offices tab.
The table lists Logo, Name, Code, Country, City, Contact Person and
Actions. Use the action menu at the end of a row to work with an existing office.
Add an office
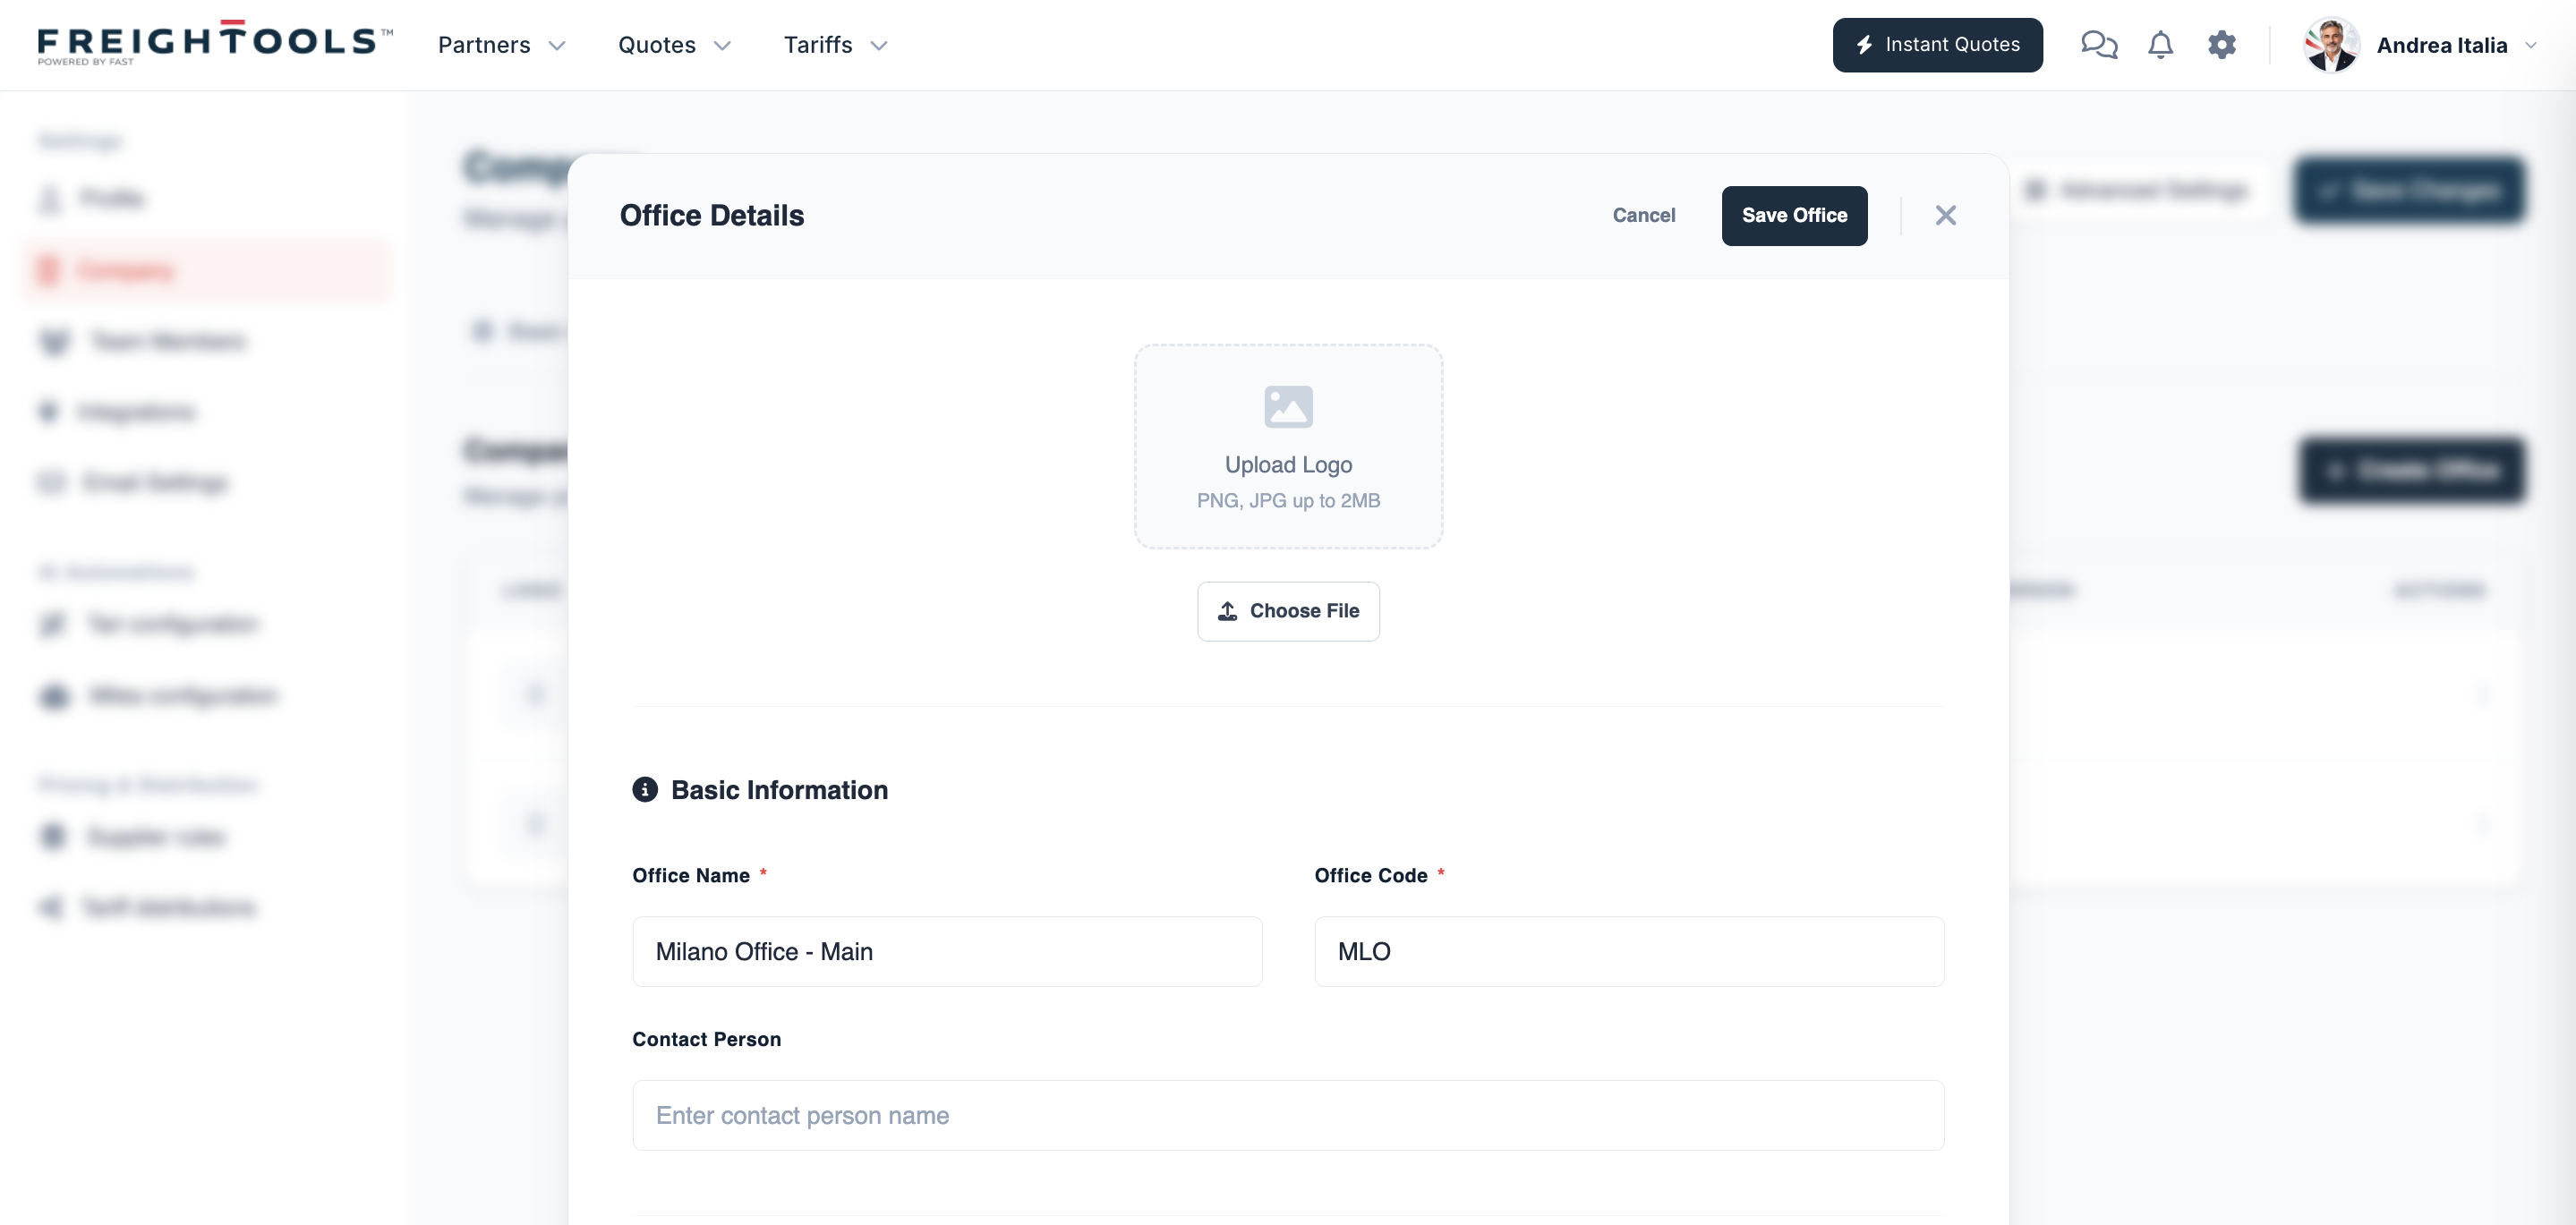
Click Create Office. The Office Details dialog opens, and you fill it in from the top.
Basic information
Upload a logo for the office if you have one — PNG or JPG up to 2 MB — then fill in:
| Field | Notes |
|---|---|
| Office Name | Required. The name people will recognise, for example Milano Office - Main. |
| Office Code | Required. A short code for the office, for example MLO. |
| Contact Person | The person to contact at this office. |
Address
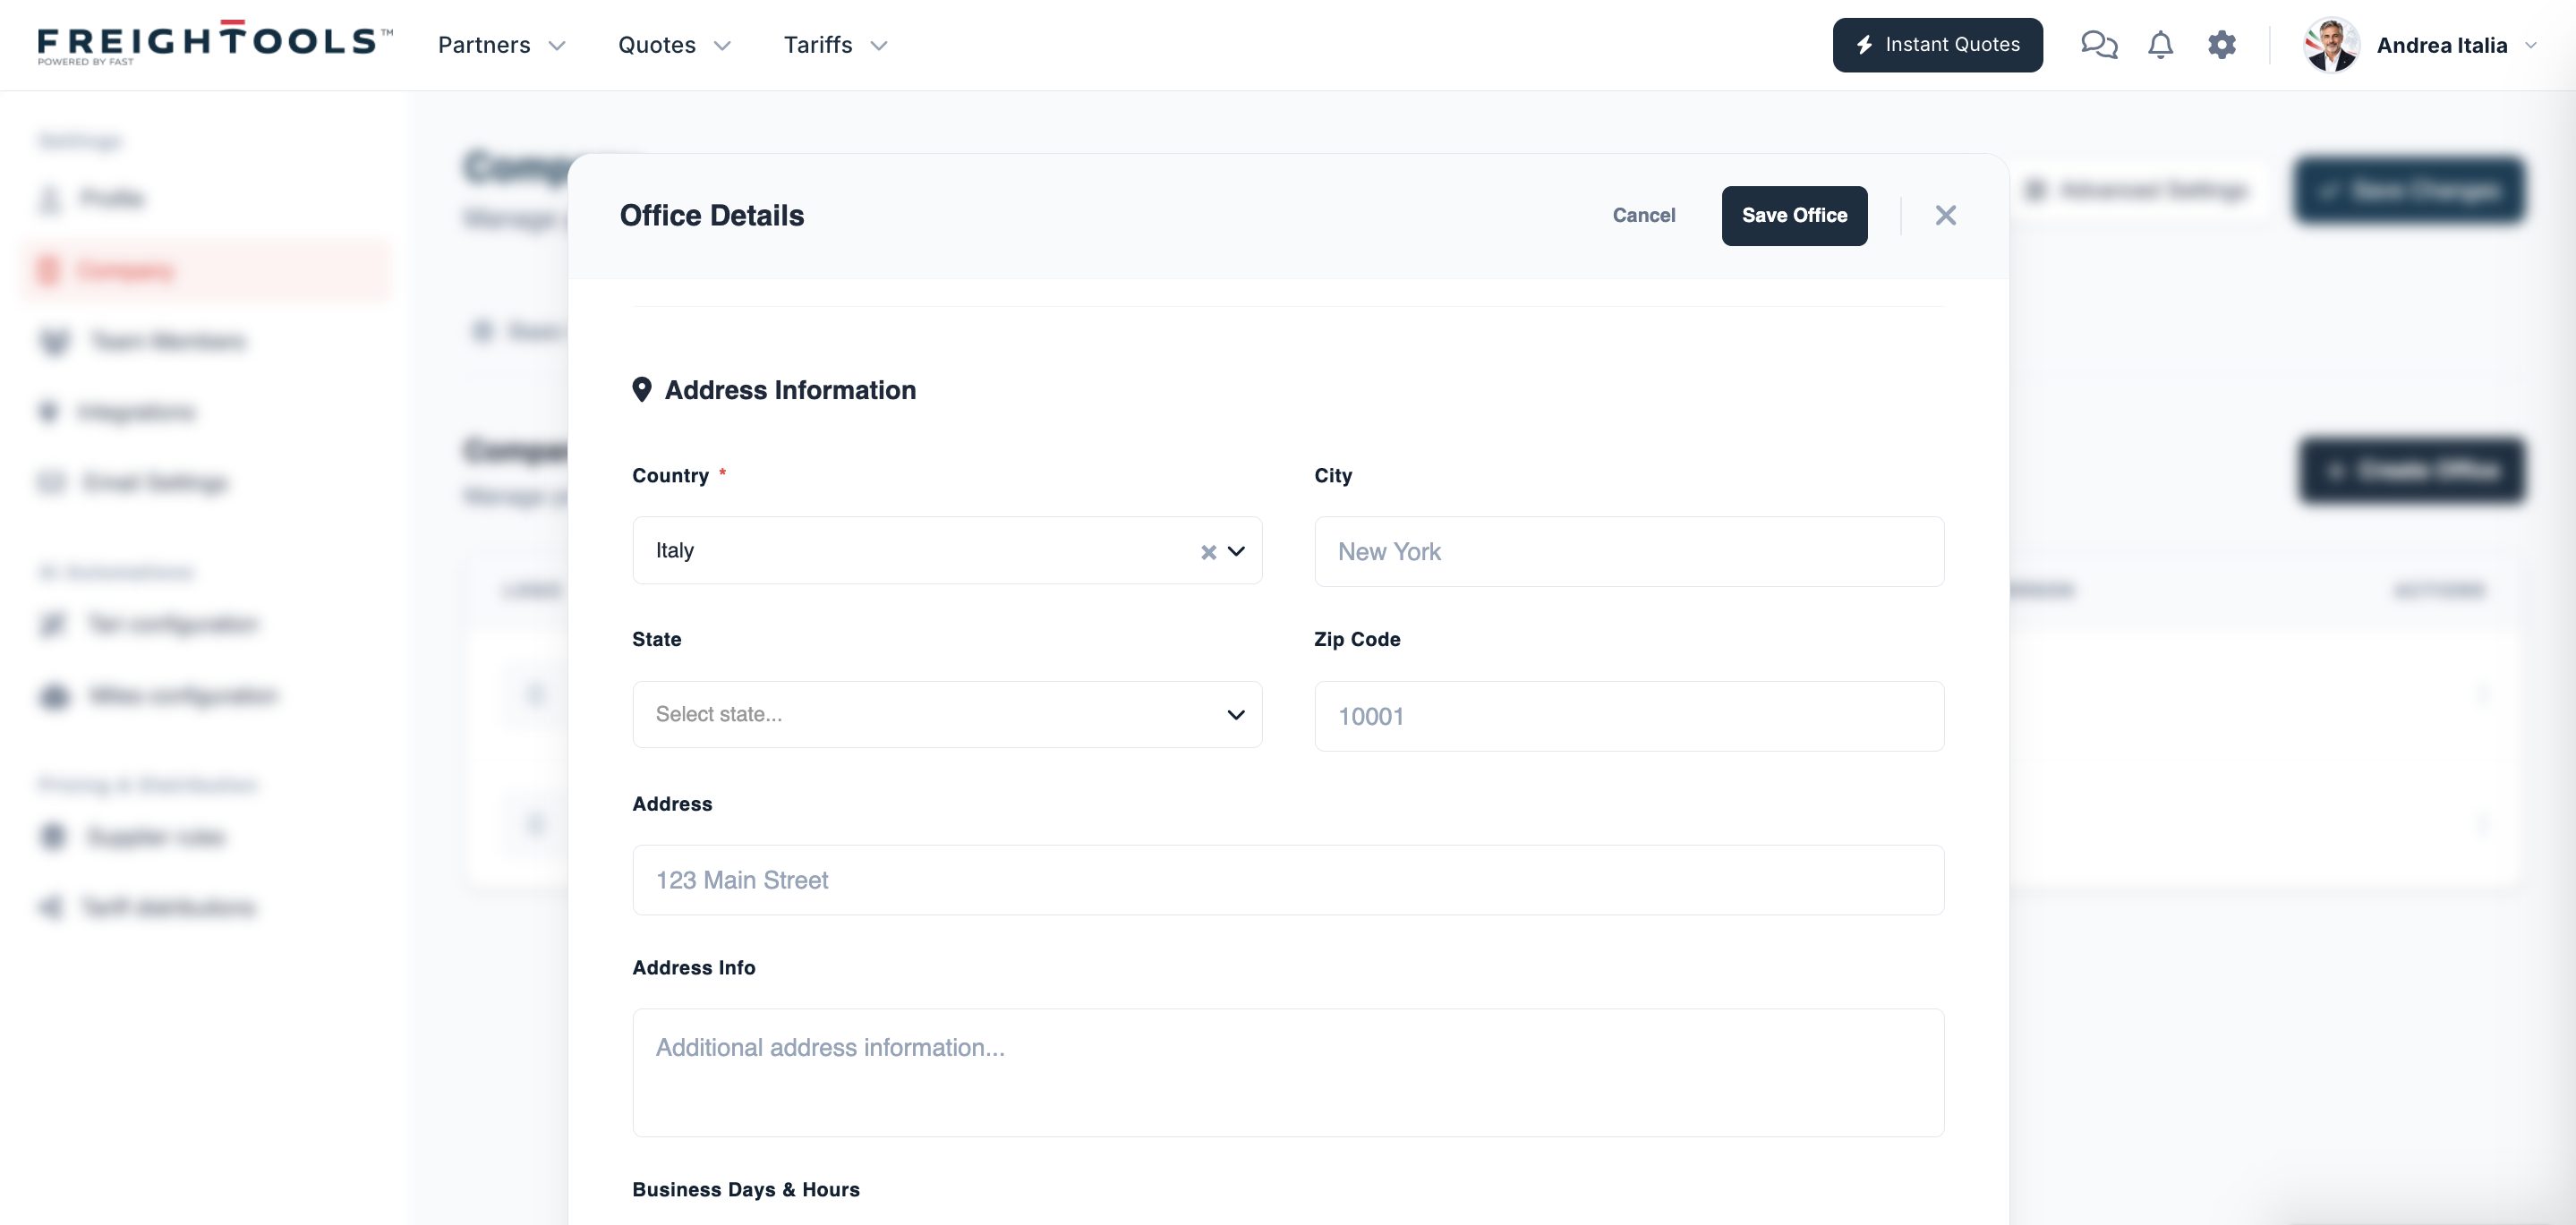
Under Address Information, Country is required. Add City, State, Zip Code,
Address and any Address Info — a floor, a gate, a delivery instruction — that people need
to find the place.
Opening hours and contact details
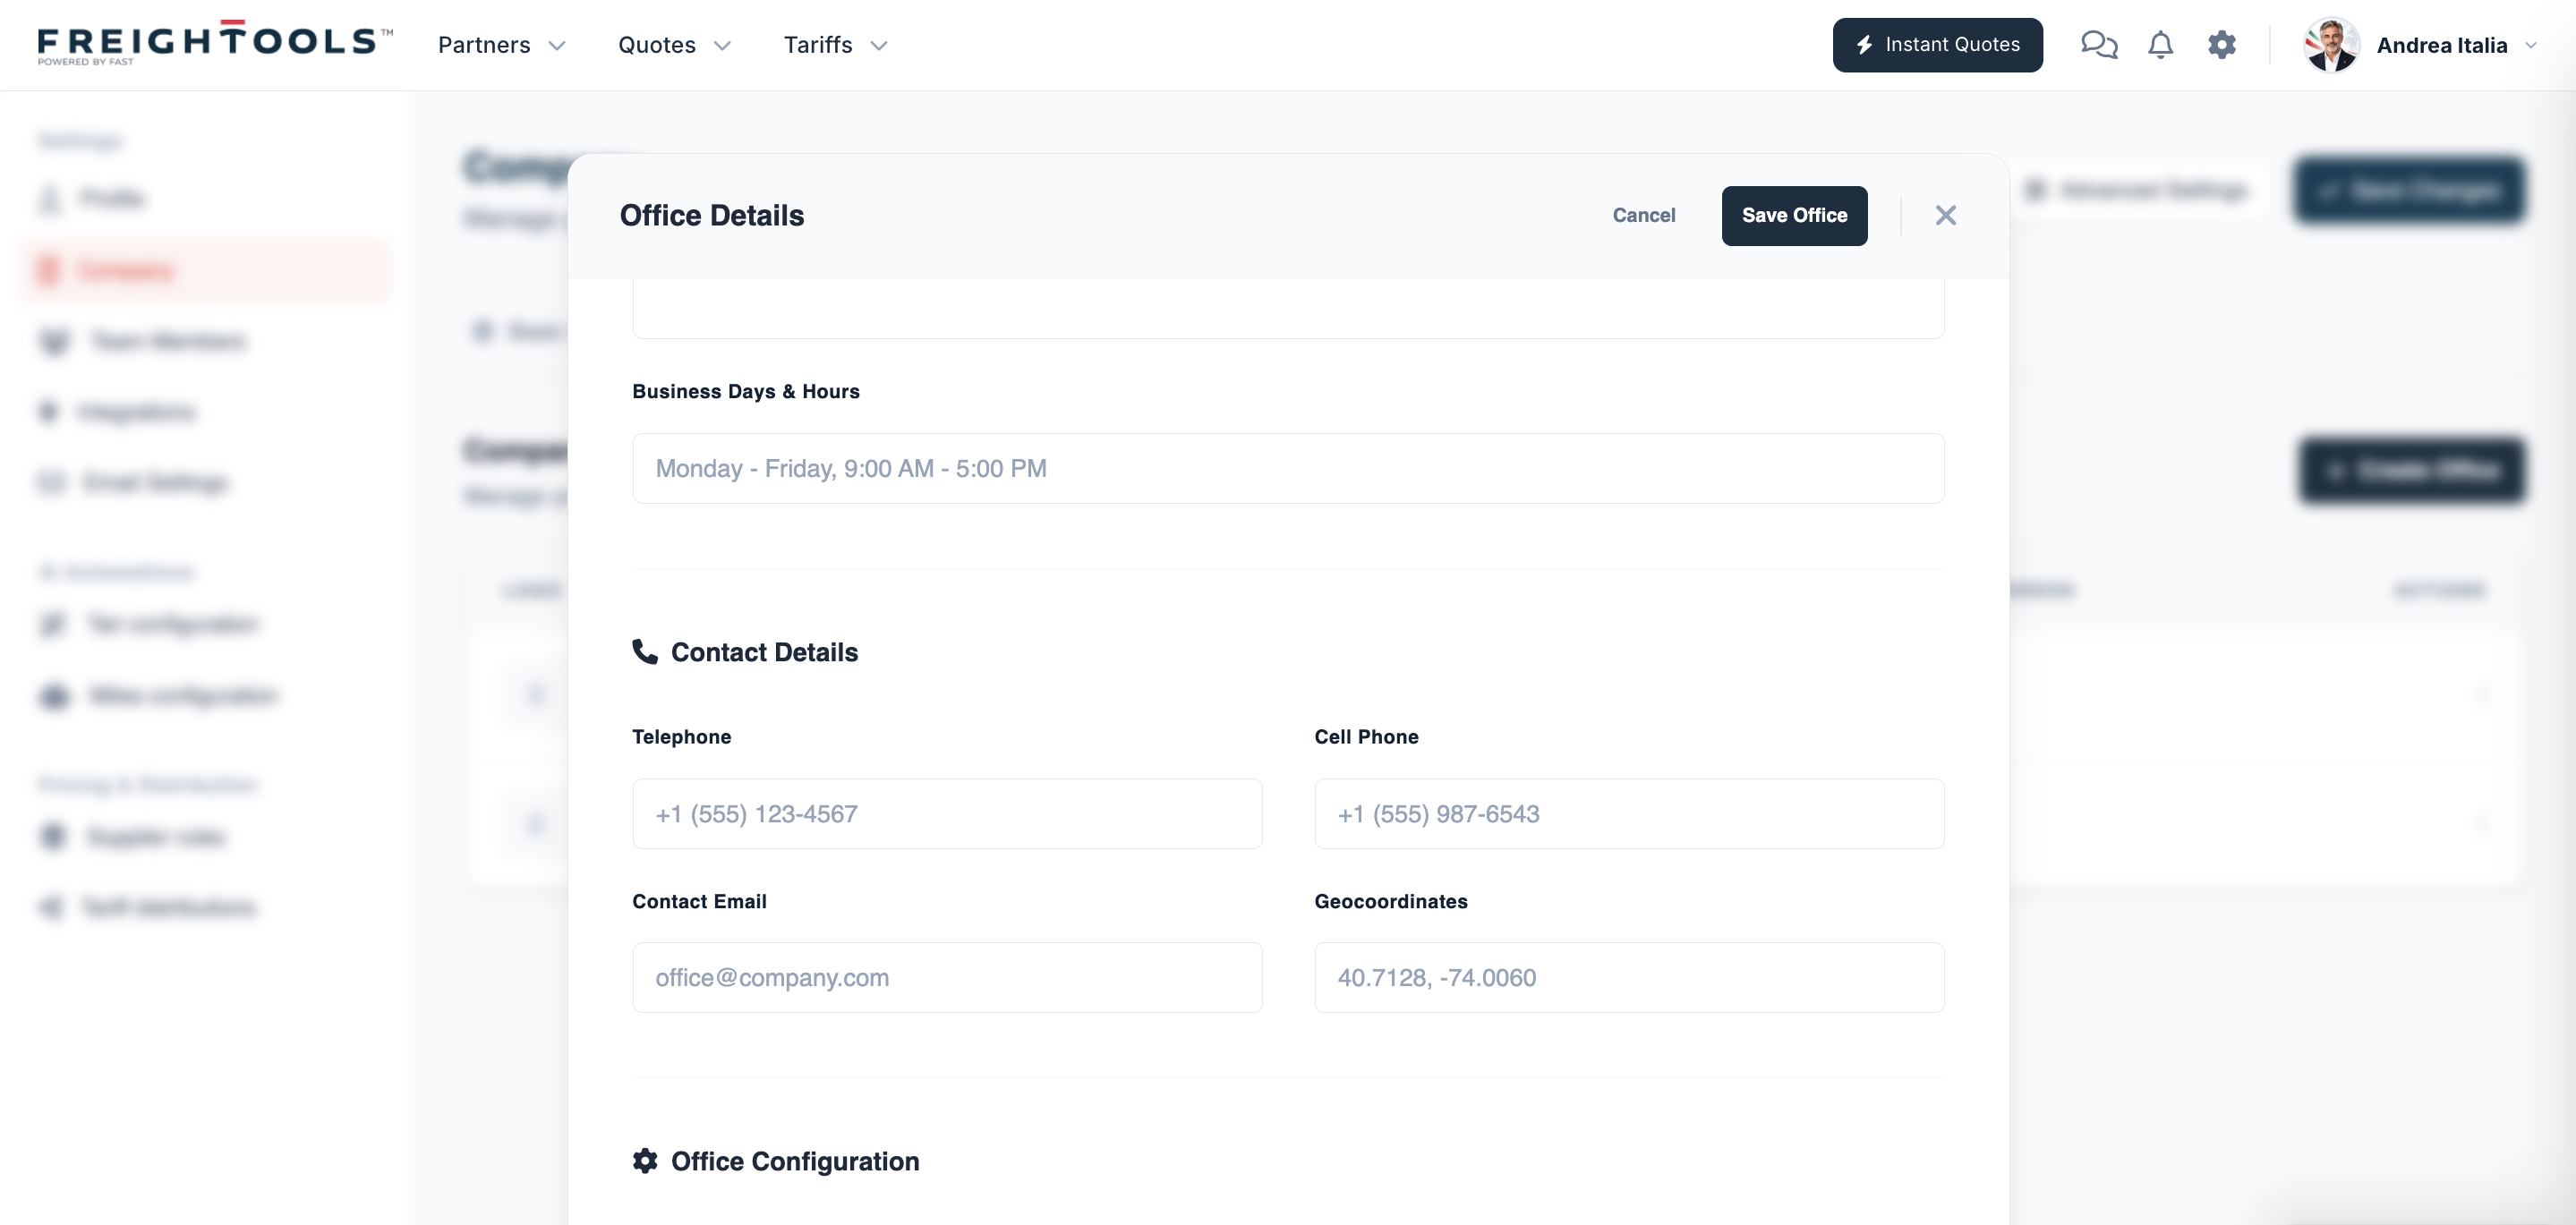
Business Days & Hours is a free-text field, so write it the way you want it read, for exampleMonday - Friday, 9:00 AM - 5:00 PM.
Under Contact Details, add Telephone, Cell Phone and Contact Email.
Geocoordinates takes a latitude and longitude pair such as 40.7128, -74.0060.
What the office does
Office Configuration records the functions this office covers. Tick Warehouse if the
office holds cargo, and tick the departments that work there: Sales Department,
Operations Department, Accounting Department and Management.
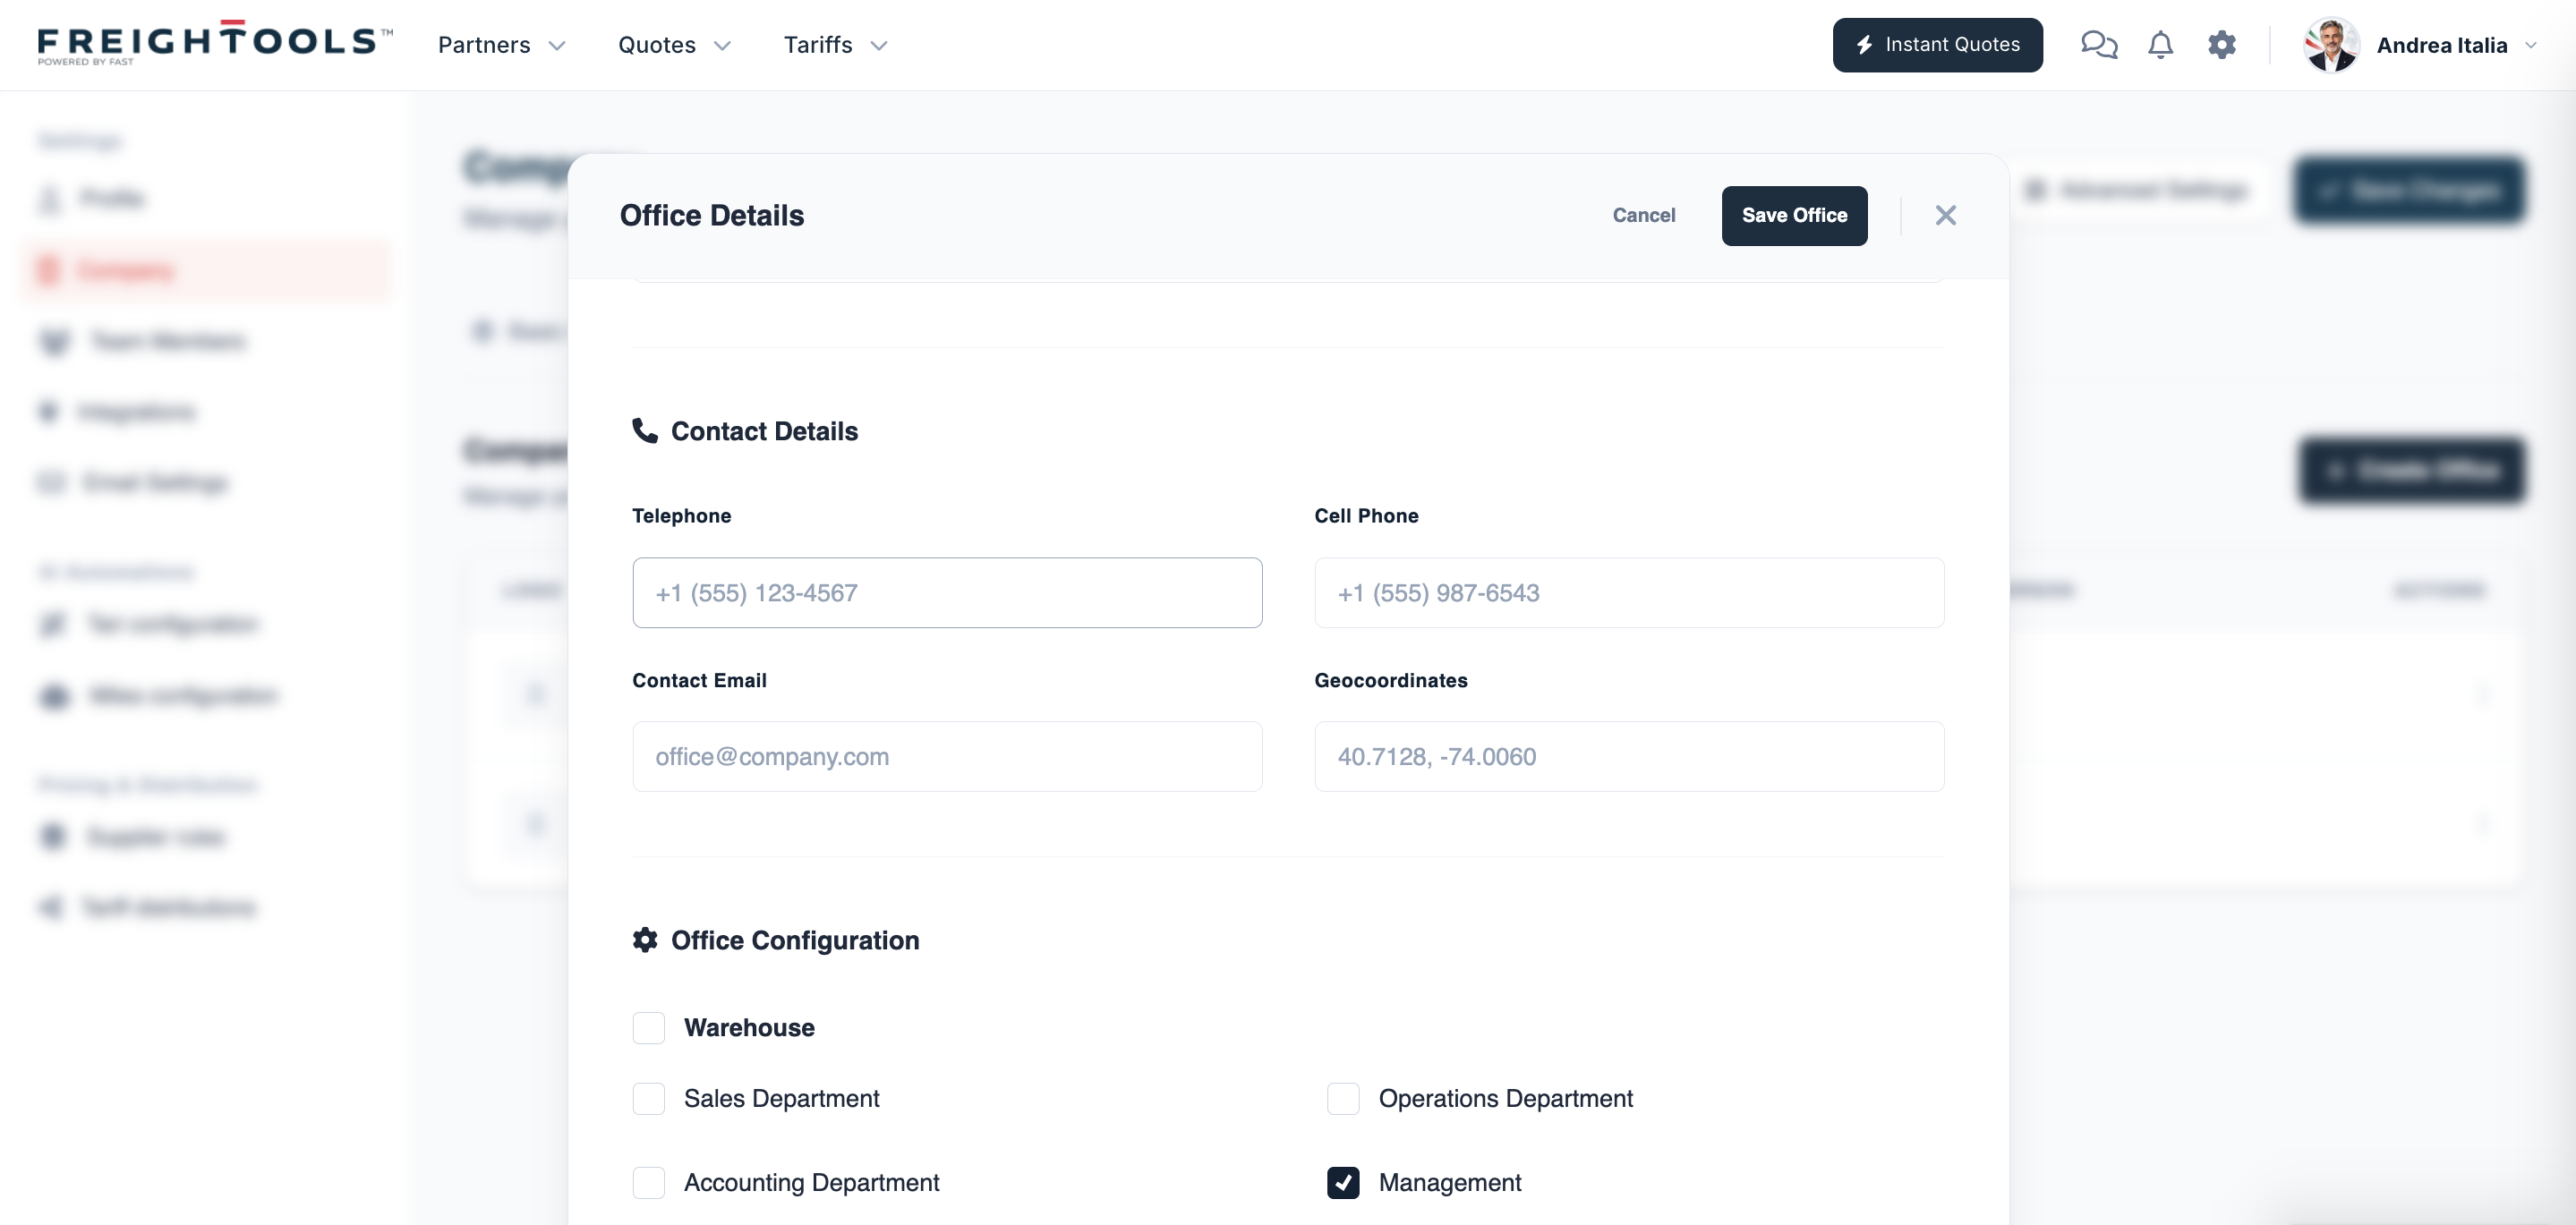
Click Save Office to finish, or Cancel to close without saving.